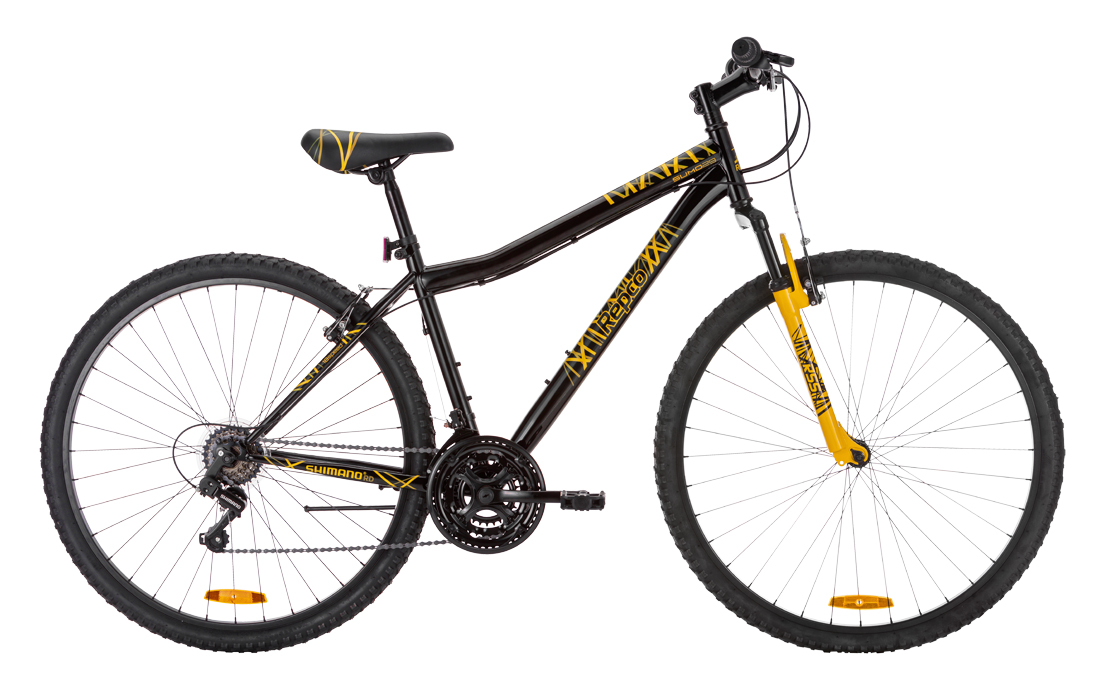
Includes Models: Blade 24, Haven 24, Blade 26, Haven 26, Charger 27.5, Sumo 29
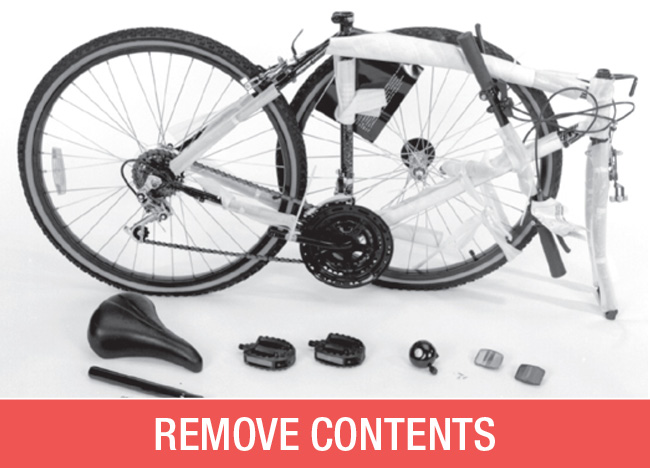
Open the carton from the top, and remove the bicycle. Remove the straps holding the front wheel, handlebar assembly, and the following components: Seat post with saddle, pedals and any other components. Remove the protective paper wrapping from the bicycle.
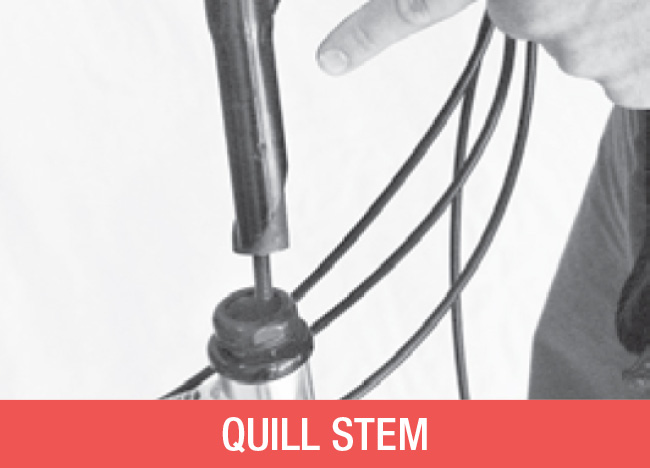
For models fitted with a quill stem, remove the protective cap from the handlebar stem and loosen the centre bolt in the head stem using a 6mm Allen key. Insert the headstem with handlebar assembly into the head tube of the bike. Re-tighten the headstem ensuring the minimum insert mark is fully covered, with both handlebars and forks facing the front. To adjust handlebars to correct angle loosen clamp bolt using 6mm Allen Key. Ensure clamp bolts are firmly retightened.

For models fitted with an Ahead stem assembly, the bearings are adjusted via an 5mm allen head compression bolt and then fastened by clamping the stem directly to the fork steerer. To assemble, remove all protective covers and unscrew bolt holding top plug. Slip handlebar stem over exposed fork steerer and replace top plug. Make sure the handlebars and fork face the front. Without over tightening, carefully tighten down the steering assembly via the Allen head centre bolt so there is no bearing freeplay. Firmly tighten up the binder bolts which clamp the handlebar stem to the fork steerer.
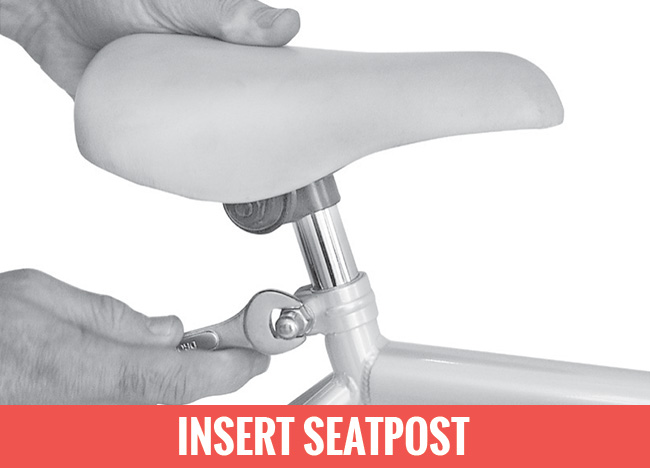
Insert the seat post with saddle into the seat tube of the bicycle ensuring the minimum insert mark on the seat post is fully covered inside the frame. Tighten the seat tube clamping bolt using a 13mm spanner.
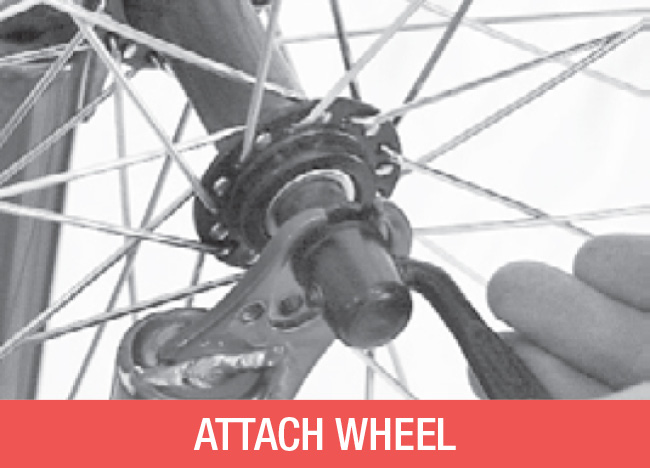
Turn the bicycle upside down and rest it on the seat and the handlebars. Insert the front wheel into the forks. Where supplied, ensure that the small tab on the washer under the wheel nut is located in the slot in the forks. This tab will ensure that the wheel will not fall out should the nuts become loose. Tighten the wheel nuts using a 15mm spanner.
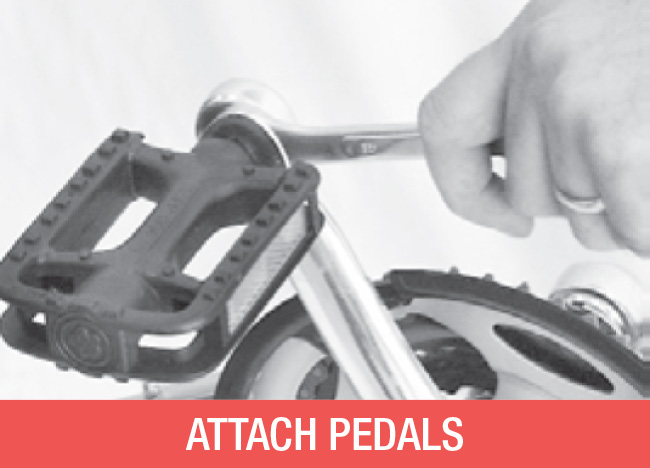
Attach the pedals carefully, engaging the thread initially by hand. The right hand pedal is marked with an “R” and attaches to the right crank in a clockwise direction (the right side is the one with the chainwheel). The left pedal, is marked with an “L” and attaches to the left crank in an anticlockwise direction. Tighten pedals very firmly using a 15mm spanner. Note: damage will occur if pedals are not attached in the correct direction and firmly tightened.
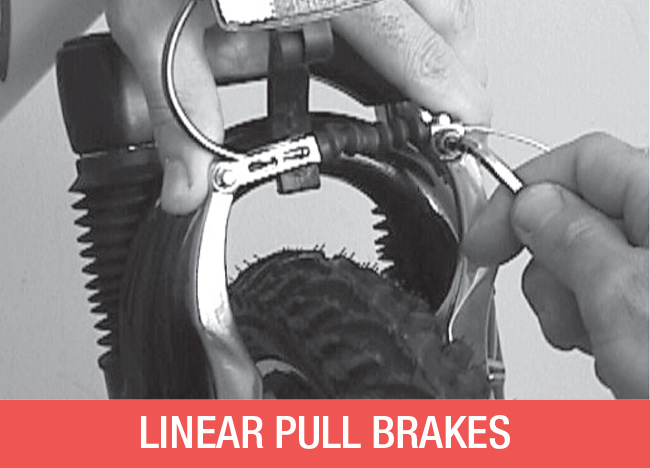
For models with linear pull/rim brakes, adjust the front brake by loosening the brake cable at the anchor bolt using a 10mm spanner. Squeeze the caliper by hand to ensure the pads sit squarely and evenly on the rim. Pull the cable tight and re-tighten the anchor bolt so that the brake pads are a maximum of 2mm from the rim on each side. Fine tune by turning the cable barrel adjuster on the brake lever. Brake shoe nuts and cable anchor must be firmly tightened. Check adjustment for rear brake and test both. Be sure that right hand brake lever operates front brake, and the left lever operates the rear brake.
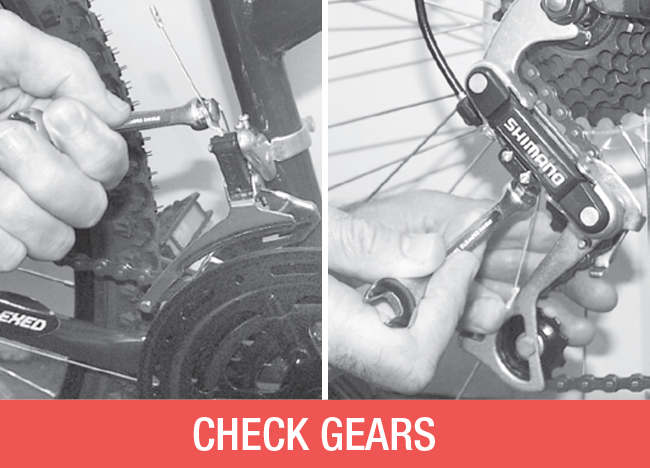
Before operating the gears, check that the 10mm anchor bolts which clamp the front and rear control cables, are firmly fastened. Only then test the gears ensuring the drive chain moves freely into each position when the control levers are activated. If further adjustments are needed, refer to the relevant section in The Owners Manual. Attach the bell to the left hand side handlebar. Attach the red rear reflector to the bracket provided and the white reflector to the front. Adjust reflectors to the 90 degree vertical position.

Important! Do not ride until brakes are operating correctly. Ensure cable end protectors are fitted, crimping with a pair of pliers. Ensure all nuts, bolts and fittings have been correctly tightened and tyres inflated to pressure written on tyre sidewalls. Ensure seat post and head stem are inserted past the minimum marks. Road test gears and adjust if needed. This bicycle must be regularly lubricated, tightened and adjusted to ensure maximum performance and safety. Proper maintenance of your bicycle ensures you will enjoy many years of happy riding. We recommend that you book your bike into a bike shop for regular services at no longer than six month intervals to ensure maximum performance.